
How to Remove a Printer
This document walks you step by step on how to remove a printer from your list of printers.
Instructions
Step 1. Type in the Windows Search bar 'Printers' and hit enter or click on 'Printers & Scanners' in the search results.
Step 2. Click on the printer you wish to add and click on 'Remove device'.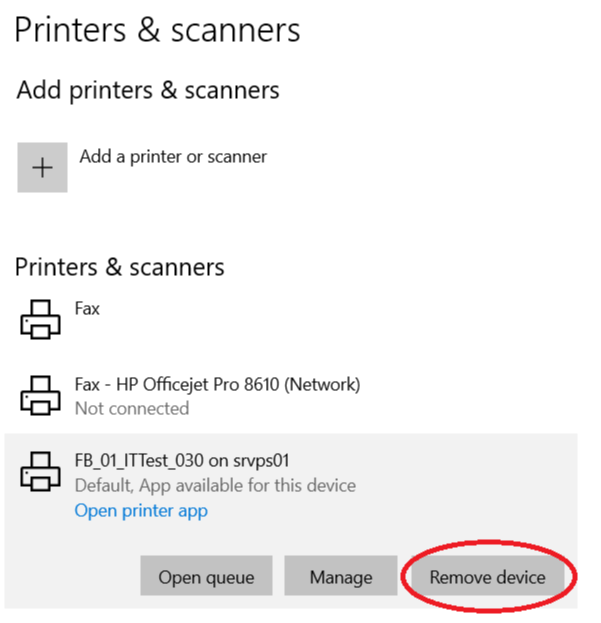
Step 3. You will be prompted to confirm that you wish to remove the device/printer. Click 'Yes' if you wish to remove it. It will then disappear meaning you have successfully removed the printer.
Questions & answersQ: The printer didn't disappear?A: It is most likely that your computer has been automatically given that printer due to the group you are in. If you are a line lead, you will be in a group that is automatically given printers that are on the factory floor near you. These printers cannot be removed unless you contact IT to change the group you are in. For example, if you have moved from Freeburg to Eldon and no longer need the Freeburg printers assigned to you, IT will need to change you from the Freeburg group to the Eldon group and you will automatically receive the Eldon printers.Q: The printer is asking for a username and password to remove it?A: Please contact IT. We are working on a way to eliminate that problem to give more control for users to manager their list of printers.
Additional Help
If you have any questions or ideas to make this document easier to follow, please go to the top right above this document to Submit a Request or the Contact us link below and we will answer any questions or implement ideas!