
How to Set Your Default Printer
This document will walk you through how to set a printer as your default printer for Windows 11.
Windows 11 will have this icon on the bottom of your screen. If you don't have this icon, you may need to go back to the one that says 'Set Your Default Printer (Windows 10).

Default printer?
A default printer is a status to which you can assign to a printer. After the printer has been set as your default printer, it will be automatically selected when you print an email, order, or a pdf. This saves time from having to scroll through your list of printers for the one that you need.
Instructions
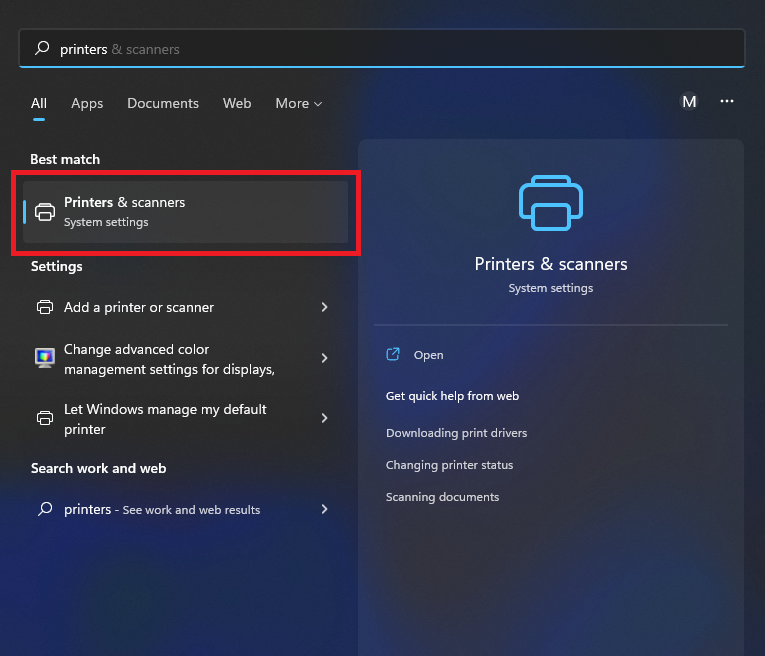
Step 1. Click the Windows iconand type 'Printers' and hit enter or click on 'Printers & Scanners' in the search results.
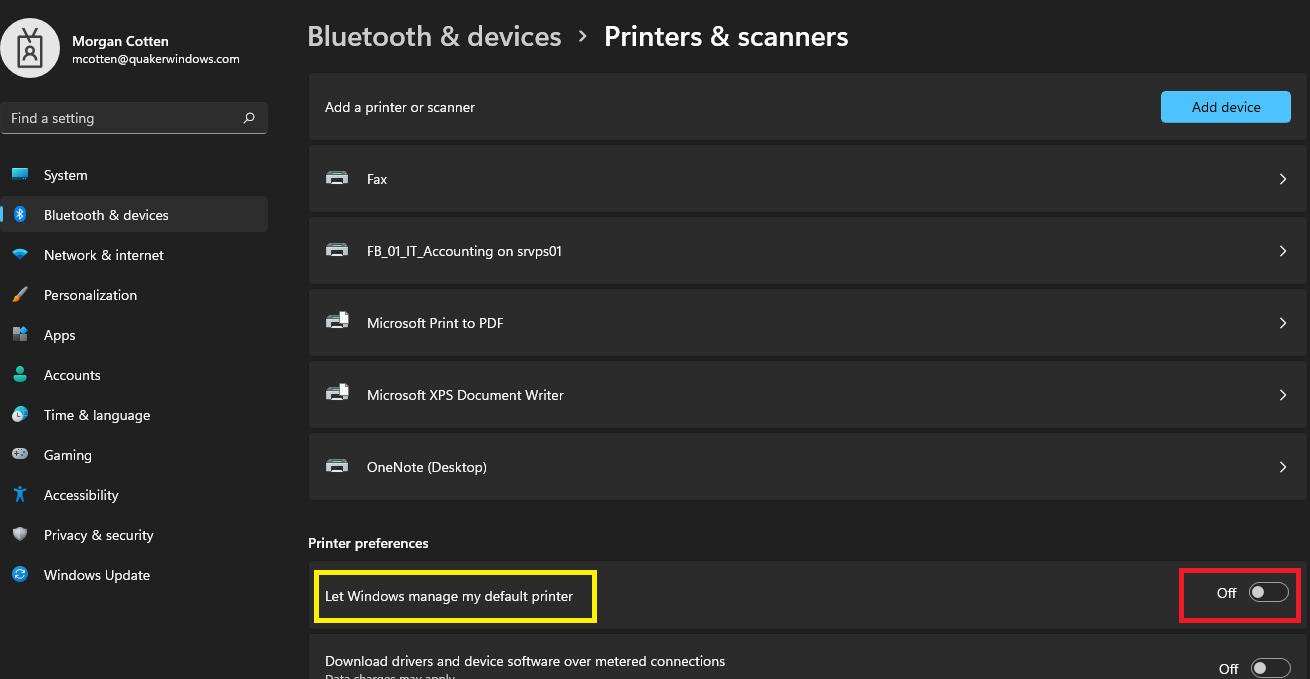
Step 2. Go to "Let Windows manage my default printer" and turn it off by clicking the ball. If it is already off, keep it off.
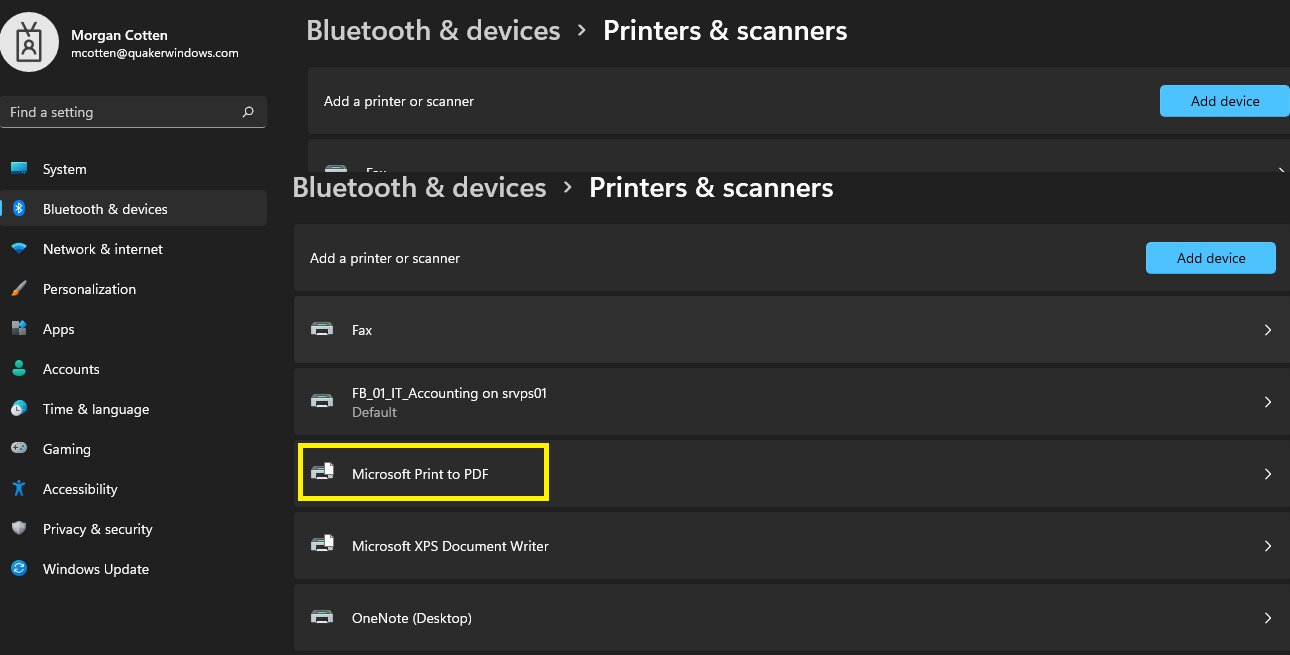
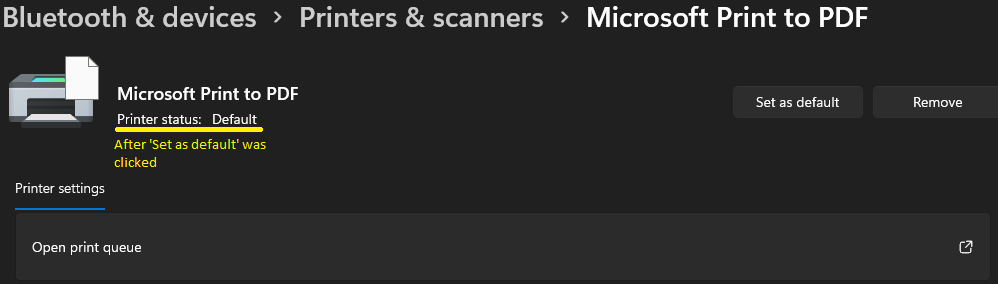
Step 3. Click on the printer you want to always print to. (In this example, I will change my default printer to "Microsoft Print to PDF")
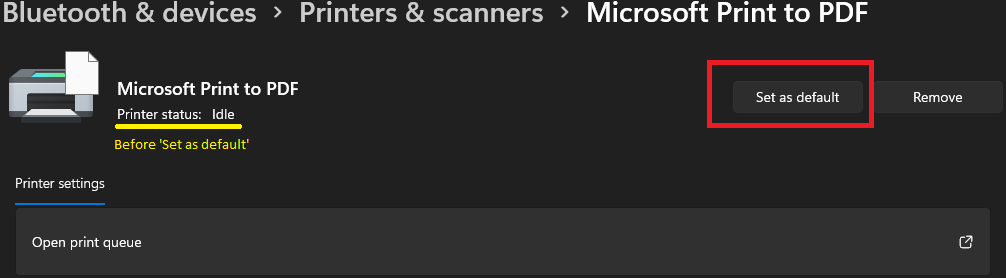
Step 4. Click on the button "Set as default" and the printer status under the name will change from "Idle" to "Default".
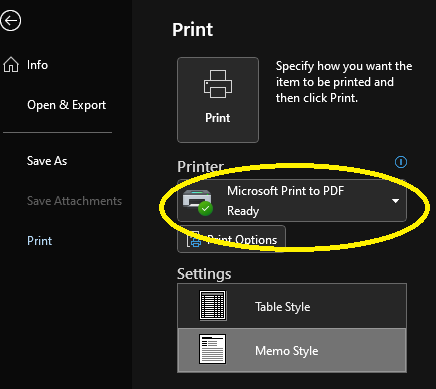
Verifying FunctionalityStep 1. To make sure the printer is your default printer and working properly, open your email.Step 2. Click on a random email.Step 3. Go to File at the top left corner.Step 4. Confirm that the printer you had set as your default printer automatically shows as the printer the email will print. Above I had selected "Microsoft Print to PDF" to be my default printer and below you can see that it was successful.
Additional Help
If you have any questions or ideas to make this document easier to follow, please go to the top right above this document to Submit a Request or the Contact us link below and we will answer any questions or implement ideas!